
Projects that are easy enough a Pickle can make them, while being exceptionally useful, cute, and easy on the budget--that's the definition of a Pickle project.
Homemade gift giving just went up a notch with this project. Designed for the more tween-aged Pickle crowd to create, this project also requires minimal tools and supplies to create a memorable keepsake gift. And what could be more memorable than pictures...on wooden blocks. Wooden Picture blocks!
Homemade gift giving just went up a notch with this project. Designed for the more tween-aged Pickle crowd to create, this project also requires minimal tools and supplies to create a memorable keepsake gift. And what could be more memorable than pictures...on wooden blocks. Wooden Picture blocks!
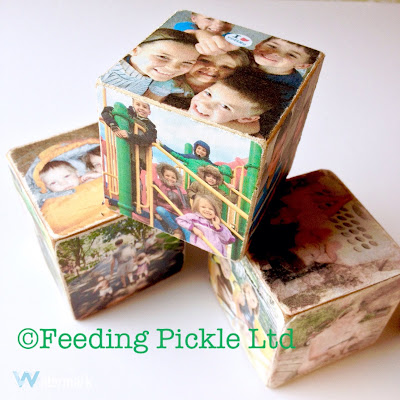
A dozen years ago we made a set for my husband, which he proudly kept on his desk at work. The (then little) Pickles would play with them and leave them in a new arrangement each time they visited him there. At just 2" square each, they take up far less space than a collection of picture frames. On a set of three blocks, 18 photos are showcased.
Make some for yourself or to give to your BFF. All those Instagram photos just found a home. No matter who you choose to share your Wooden Photo Blocks with, the smiles will exponentially increase!
To make Wooden Photo Blocks:
--A set of 2" square wooden blocks
--photos/computer/printer
--glue
--sandpaper or file
--photos/computer/printer
--glue
--sandpaper or file
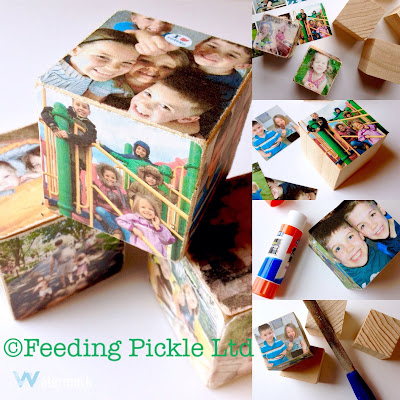
1. Select photos (for each block, you will need 6 photos) and print them out on a sheet of paper in 2"x2" squares. Yes, plain old printer paper is what we used.
2. Cut photos out.
3. Glue photos to each side of block. That is a regular little glue stick you see in the photo there. Use a glue stick, or use another glue you have on hand and apply a thin coat of glue to the block with a paintbrush before adhering the photo. Be sure to apply the glue well even to the uttermost corners! And yes, the paper may just barely go over the edges. Don't let it worry you--we'll get to that in step 6..
4. Let. It. Dry. (I know, I know. The hardest part of the whole project.)
5. Now that it is dry, take sandpaper or a file to the edges of the block. Work the sandpaper from the edge of the photo, and OVER the edge, off the block. (You don't want to push the paper edge upward.) Sand until you can see a bit of the wood block corners and the paper is blended into the edge of the block. If any paper corners come loose, just sneak a little glue back under them and re-adhere.
6. Choose how to gift them. Add eye hooks and a ribbon and you have an ornament. Tie it up with a big sparkly ribbon. No matter how you choose to share, give it with a smile and enjoy watching the smiles spread.
1 comment
This sounds like a fun project to share with my young niece and nephew. We have some scrap wood that I think would work. I will add this to my list! Thanks
Norma A Fitzwater