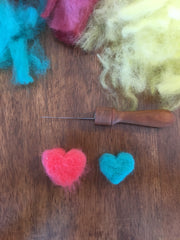
No step, in the entire process of dyeing our wool to creating these felted hearts, was in any way hard. It is all quite easy, actually. But easy does not need to mean fast. This project is a perfect way to nurture the appreciation that there is a beauty in the slow and steady process and worth in the outcome it brings.
_______________
When a pile of fluffy colorful roving has been created, it just beckons for more creativity to join it. After dyeing some wool roving with Kool-Aid as we did here, we pulled out our felting needles and created little bundles of colorful, wooly love!
_______________
When a pile of fluffy colorful roving has been created, it just beckons for more creativity to join it. After dyeing some wool roving with Kool-Aid as we did here, we pulled out our felting needles and created little bundles of colorful, wooly love!

Because we dyed a longer fiber merino, we took the time to pull apart and cut short some of fiber. Using a metal cookie cutter as our template, we pressed our wool bits into the cutter and proceeded to use our felting needle to connect the fibers inside, adding more fiber as needed.


When we were satisfied with the depth of the wool felt heart we were creating, we removed the cookie cutter frame, and proceeded to use our felting needle to felt around the heart, defining the shape, and firming up the outer edges.


As an alternative for younger hands, to keep them away from the sharp needle, we used a stack of three cardboard pieces with our heart cut from the middle to create a template with a large "holding" surface. The cookie cutter can be slipped into the template, if desired, to keep from grabbing bits of cardboard with the needle which end up felted into the wool.

Then we strung them to hang and enjoy!

Needle felting--have you tried it yet? What projects have you loved making?
Always be creative,
Marie Winfield
Marie Winfield

